5 Steps on Operating Your KitchenAid Food Processor
Do you have a KitchenAid Food Processor and don’t explicitly have the foggiest idea how to utilize it? Relax, I’ll tell you.
I, at the end of the day, am apprehensive and restless around kitchen machines that make a great deal of commotion or have huge, sharp edges moving at a staggering rate. All I can think when I see something as is this ‘kindly don’t remove my hand!’ In all genuinely, I scarcely passed shop class with a 57% – the boisterous machines and cleaving blades just terrified me silly. So accept me when I tell you, I could do without working any such machines, regardless of what size.
In any case, when I accepted my 12-cup KitchenAid Food Processor from my sister by marriage, I had no real option except to utilize it. What’s more, low and view, it wasn’t so awful! It wasn’t however clearly as past kitchen apparatuses and I might have been for the most part flabbergasted at how long I saved by utilizing it. Normally I physically slash up my food, daydreaming and forgetting about the time. However, with this large person, dinner is currently (normally) ready and done by 6PM. Making sauces, soups, mixed greens, and pureeing food is currently a snap.
While working a KitchenAid Food Processor, note the accompanying rules;
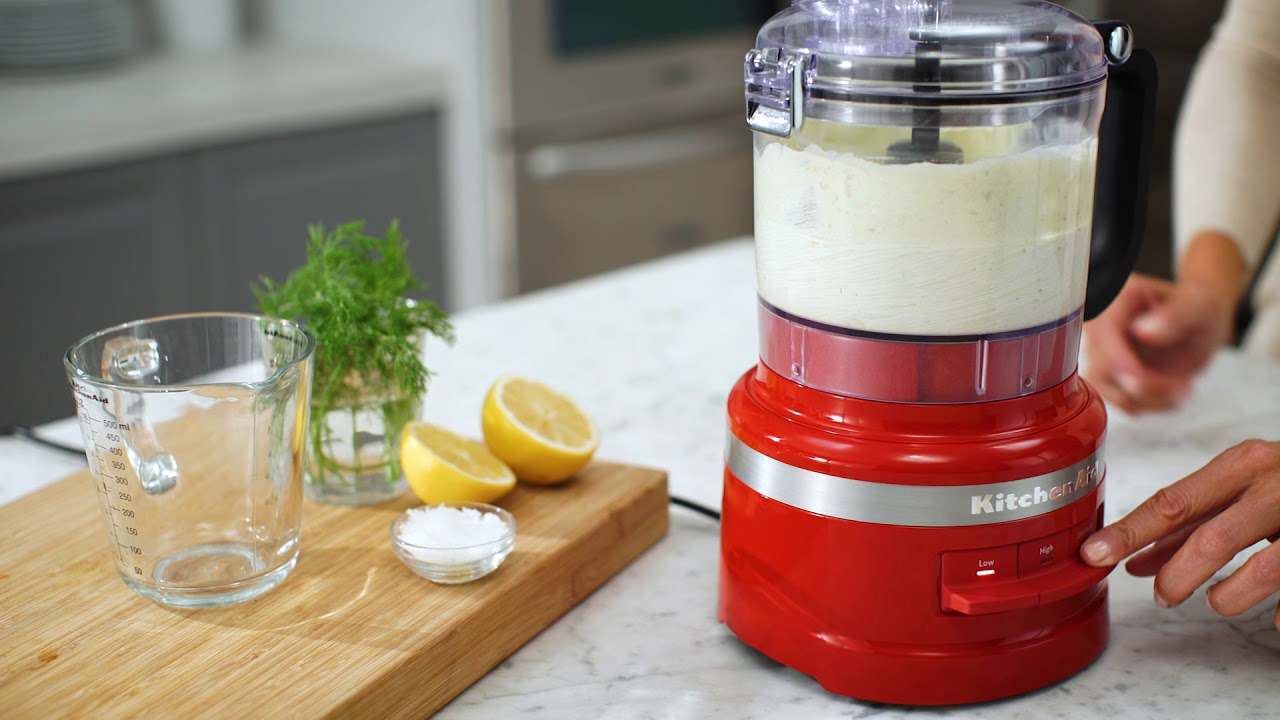
1. Ensure the Processor is on a strong and nutri bullet blender black friday level region. What’s more, possibly handle the cutting edges inside when the line is turned off! You can never be excessively cautious…
2. Assuming that the top is on (tall, thin cylinder), take it off by going solidly to one side and taking off. It is here where you will embed the fixings.
3. With the top put away supplement any food sources into the processor, making a point not to overfull it too. By and large, this would imply that you don’t fill the processor’s bowl the greater part way.
4. With the fixings securely inside, supplant the top ensuring it is solidly on (go right to draw in wellbeing lock). Hold it solidly as you turn the processor On – this button, as well as all the others, are situated on the processors base. The following stage is to press either the beat button or the puree button. This choice depends on which food you are making, and the fixings you are utilizing.
***To Puree means to ground or potentially squash food into a thick fluid or glue – for instance spaghetti sauce. At the point when you Heartbeat the food, you are simply hacking/cutting food in short augmentations to achieve the ideal consistency.
5. Presently let the KitchenAid Food Processor accomplish the work! Continue beating or pureeing until your food has been arranged by plan. Whenever this is accomplished, simply open the top once more and remove the processor from the base by contorting it to one side and taking it off. Utilizing a spatula (a table spoon fills in too), scratch out each of the handled food varieties into a container, bowl, and so forth. From here on you can clean the processor and use it again for another work. (Do this process again you might say).